Update 01/18/2014
ZeroPush introduced Hosted Push Packages. This post walks through the updated process on getting started with Safari Push.
Intro
Apple recently released a feature in Safari 7 along with OSX Mavericks that allows websites to subscribe to and receive push notifications. If you haven't already seen it in action, you can check out our demo implementation.
The developer interface for delivering the notifications is similar to the workflow you may be used for native app push notifications, but the subscription, device token management, and error logging is considerably different.
Let's take a walk through of what is needed to subscribe to, send, and receive this new type of notification.
Prerequisites
There are a few prerequisites to sending Safari push notifications:
- Sign up for a iOS or OSX developer account on the developer programs page.
- Create a unique website push ID to distinguish your site from others on the website push IDs page.
- Generate a certificate/private key pair used to encrypt your communication with the APN (Apple Push Notification) service.
Implementation
Once you have taken care of the prerequisites, the flow is kicked off by some javascript which will need to be embedded in your web page. For most of the following, we will assume the happy case where the user accepts push notifications from your site.
The sample code below is mostly provided by Apple, in their docs, with a few modifications in the interest of clarity.
document.body.onload = function() {
    // Ensure that the user can receive Safari Push Notifications.
    if ('safari' in window && 'pushNotification' in window.safari) {
        var permissionData = window.safari.pushNotification.permission('web.com.my-awesome-site');
        checkRemotePermission(permissionData);
    }
    else {
      // A good time to let a user know they are missing out on a feature or just bail out completely?
    }
};

var checkRemotePermission = function (permissionData) {
    if (permissionData.permission === 'default') {
        // This is a new web service URL and its validity is unknown.
        window.safari.pushNotification.requestPermission(
            'https://your-webservice-url', // The web service URL.
            'web.com.my-awesome-site',     // The Website Push ID.
            {user_id: 4741619481},         // Data used to help you identify the user.
            checkRemotePermission          // The callback function.
        );
    }
    else if (permissionData.permission === 'denied') {
      // The user said no. Talk to your UX expert to see what you can do to entice your
      // users to subscribe to push notifications.
    }
    else if (permissionData.permission === 'granted') {
        // The web service URL is a valid push provider, and the user said yes.
        // permissionData.deviceToken is now available to use.
    }
};
The first thing to recognize, in the above code, is that we can only continue if our user is taking advantage of the latest features of Safari 7.
Calling the requestRemotePermission function will cause Safari to make an HTTP POST request to download a zip file called a 'pushPackage'. Safari expects the pushPackage to be served from the URL:
https://your-webservice-url/v1/pushPackages/{websitePushID}
where websitePushID is the id associated with your push certificate from above.
The pushPackage contains a set of icons for your site along with a few metadata files, and a cryptographic signature that is used to verify the file's authenticity. You can create your push package using the push_package gem.
If the pushPackage validates successfully the user will see a dialog similar to:
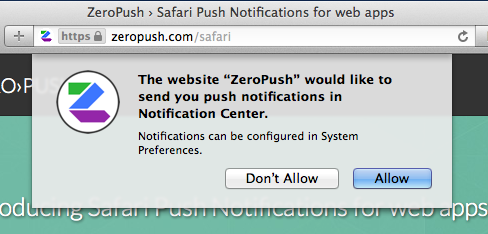
Once the user presses Allow, Safari will make a POST request to:
https://your-webservice-url/v1/devices/{deviceToken}/registrations/{websitePushID}
where deviceToken is the token used to identify the computer to receive push notifications, and websitePushID is the id from above.
Sending a notification
Now that you have a valid device token, you can use it in combination with your push certificate to send notifications using ZeroPush.
- Create a ZeroPush account
- Create an Safari app for your website
- Upload your certificate
- You can now use the ZeroPush API to send notifications
Check out the Demo to see Safari Push Notifications in action.
TL;DR
ZeroPush implements these API endpoints when using Hosted Push Packages
See this gist for an example Ruby implementation. https://gist.github.com/snatchev/7882140